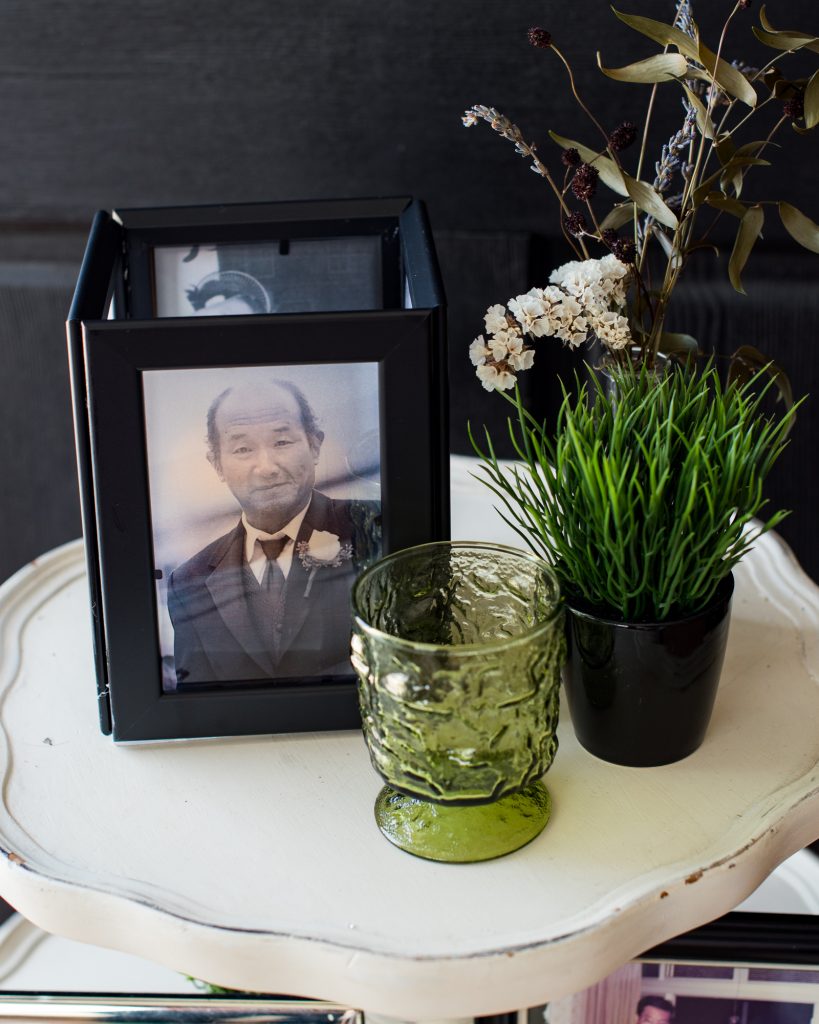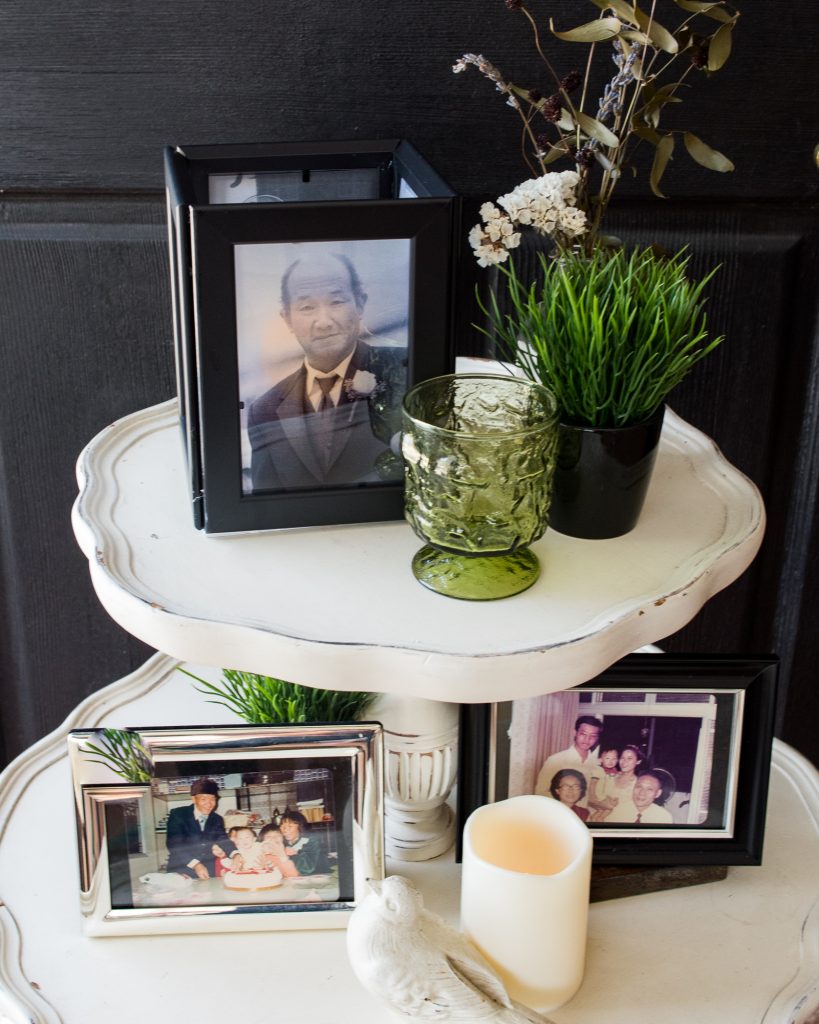
Weddings are such happy occasions with the couples surrounded by friends and family. However, if you have loved ones who have passed and cannot be there, a great way to honor them is to create a remembrance table. This table may display of framed photos, a small floral arrangement, and candles. Here’s a quick tutorial to make a photo frame luminary that can display up to 4 photos all around. See more tutorials on our blog. Vintage Props by DIY LA Bride. Photo by Amy Haberland Photography.
Before you start
Decide the size and shape of the photo frame luminary. 4×6 is a good display size. With 3 frames, you can create a triangular luminary. With 4 frames, you can create a cube luminary. Select photos in portrait orientation before printing.
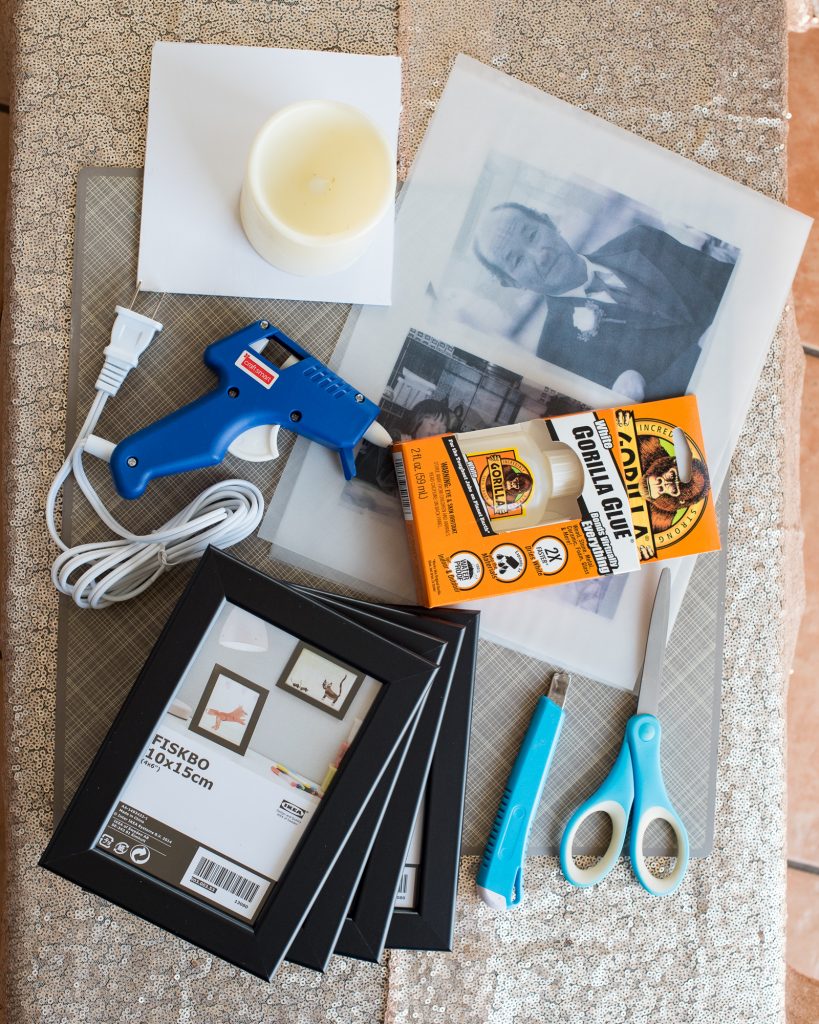 Material & Tools
- Photo Frames x4
- Printed Photo on Vellum Paper x4
- Foam Board or Corrugated Board x1
- Pillar Candle or Battery Candle
- Gorilla Glue/High-Temperature Glue Gun
- Scissors
- Exacto Knife
- Cutting Mat
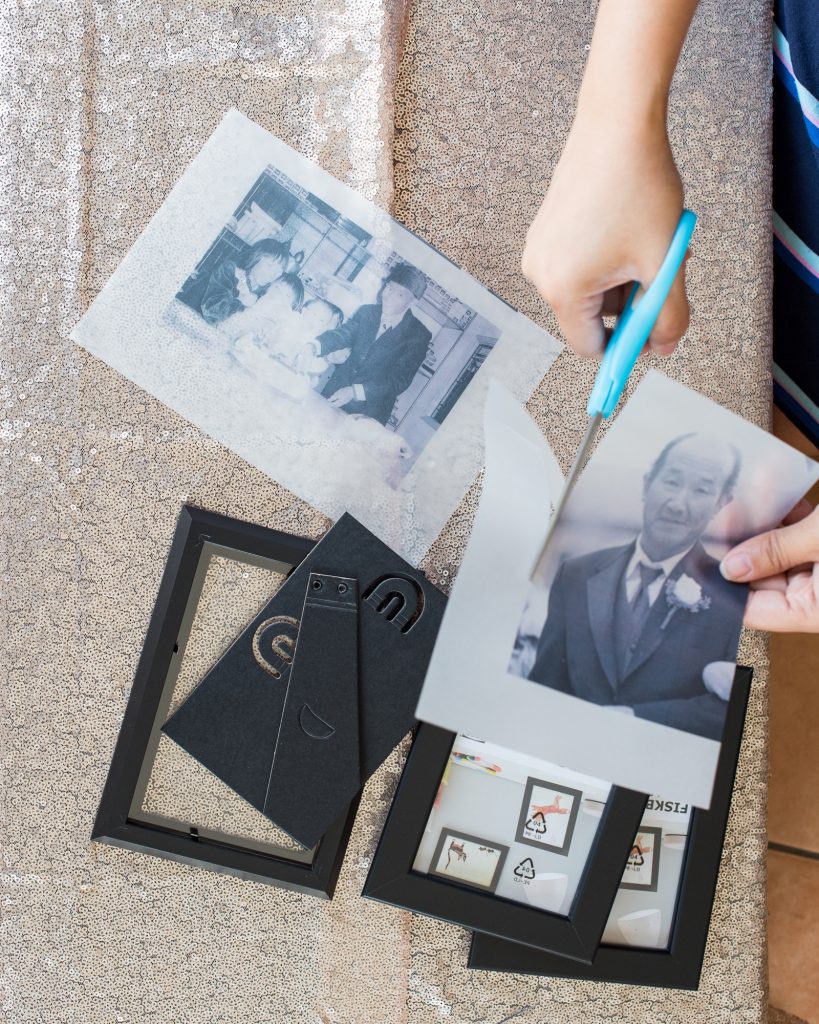
Step 1:
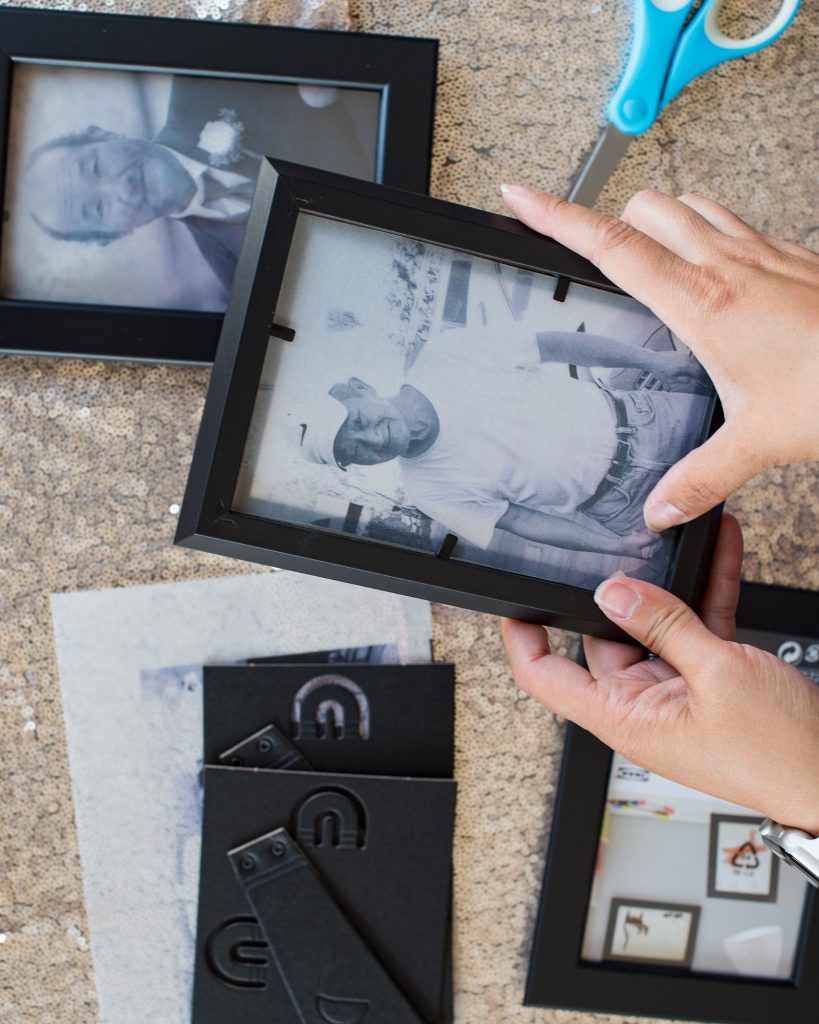
Print color or black and white photos on vellum paper. Cut printed photo to the size of the frame.
Step 2:
Remove the backing of the photo frame, place the vellum photo in the frame. Do not replace the frame backing to expose the photo to the candlelight.
Step 3:
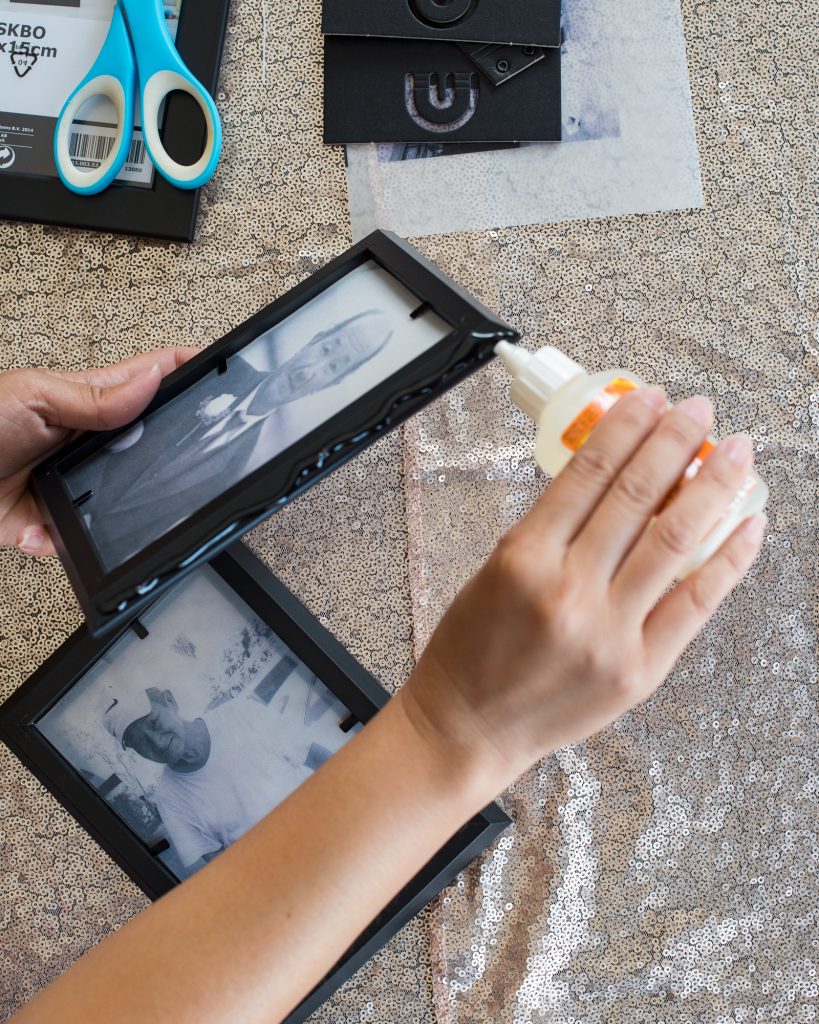
Use gorilla glue or wood glue to join the photo frames on two sides. Tacky glue may take a while to dry. For a faster option, use a high-temperature glue gun.
Step 4:
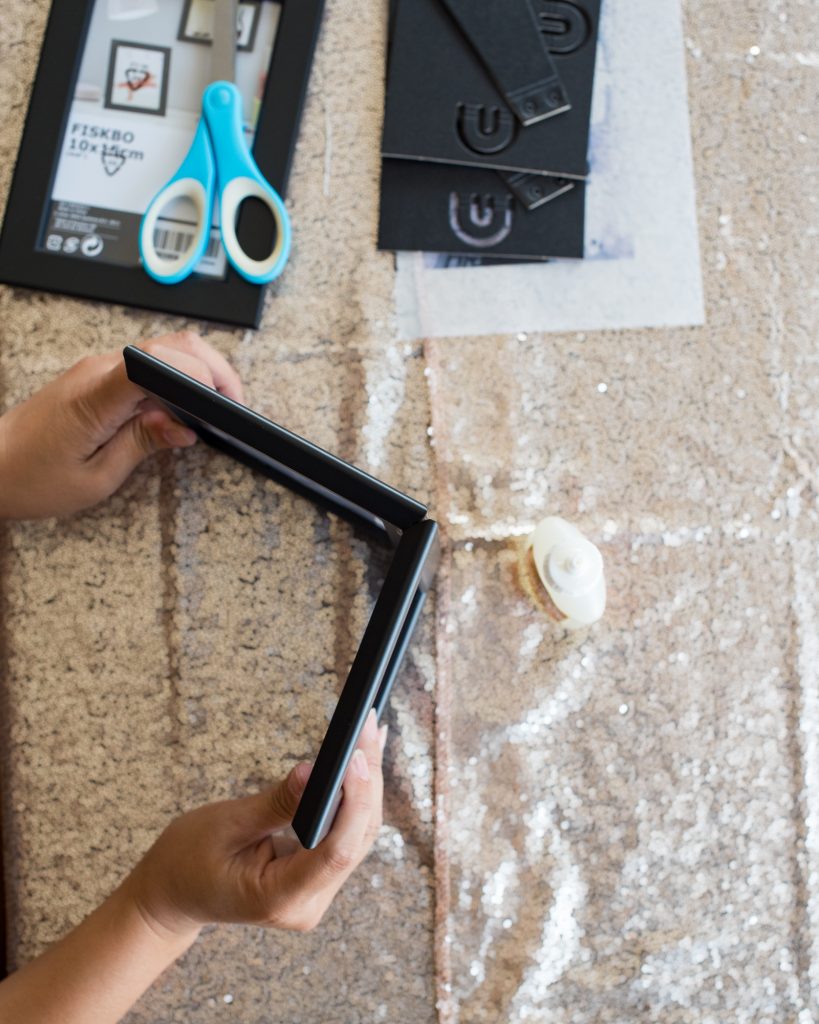
Align the photo frames to make sure the sides are even. Create a square shape with 4 frames or a triangle with 3 frames.
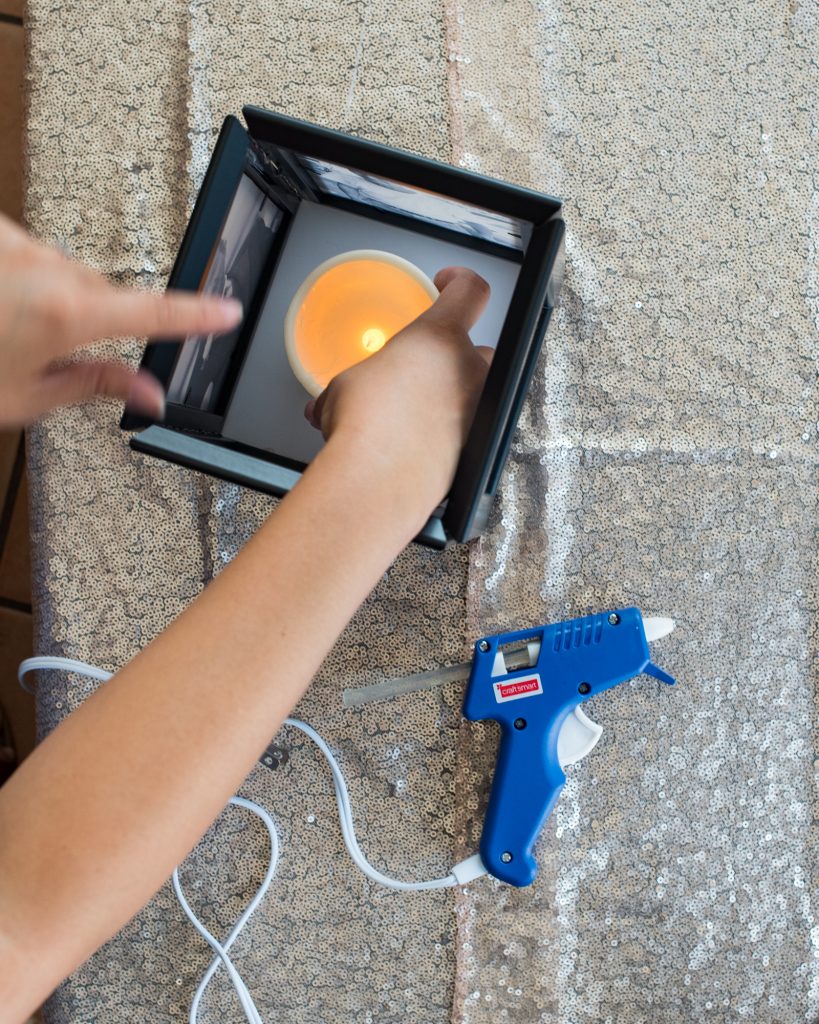
Step 5:
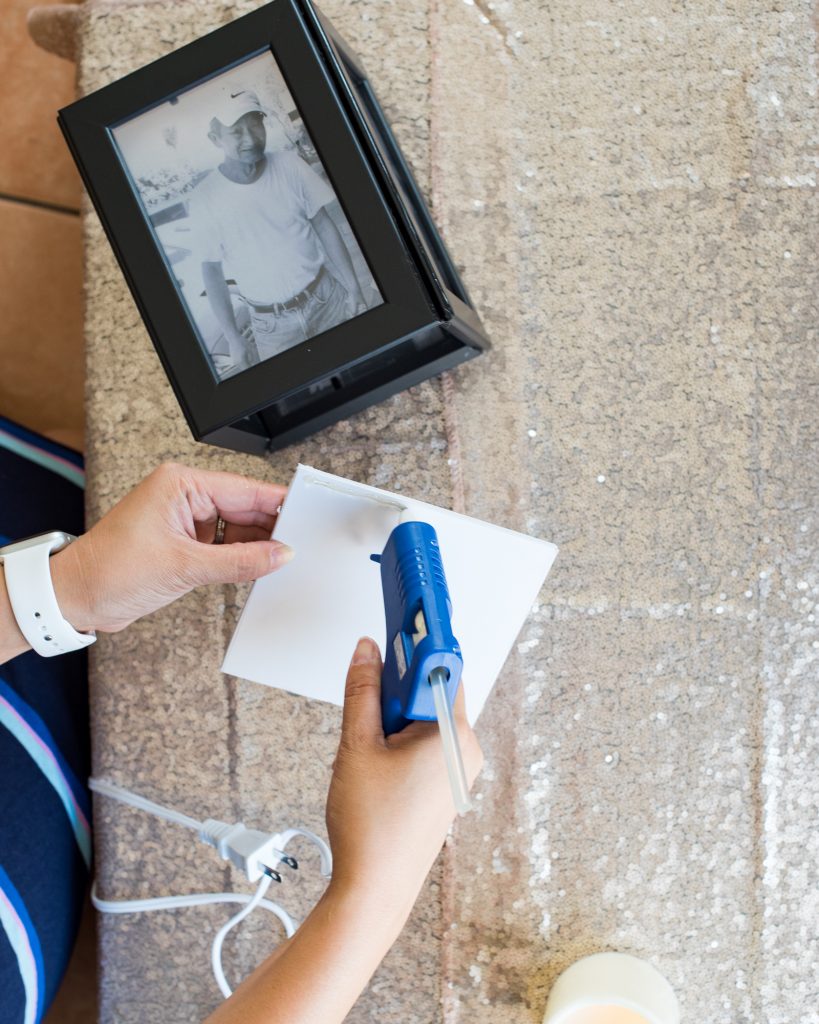
Place the lantern on top of the foam or corrugated board and trace around the edges. Cut the foam board to create the bottom of the lantern. Trim the edges so it’s not visible after sticking to the frames.
Step 6:
Use hot glue gun to adhere the foam board to the bottom of the lantern.

Step 7:
Place the candle (wax or LED) inside the photo frame lantern.
Step 8:
Style the remembrance table to honor those who cannot be present at your wedding.